
December 10 2020
A few weeks ago, I stumbled upon the Cuberto site. The site design is absolutely mesmerizing, and I fell in love with it almost immediately. But out of all the elements on the site, one of them, in particular, stood out to me. The pointer.
Custom mouse pointers are nothing new… but this one was different. As it moves closer to the hero, the pointer transforms into a video, and as it hovers over a title, the image and the text blend together. You can see it for yourself on the website.

Being the self-proclaimed Flutter enthusiast that I am, I immediately thought… “how can this be done in Flutter?“.
In CSS it’s simple. All you have to do is use the mix-blend-mode property, and you’re good to go. But it wasn’t as straightforward as I thought it would be in Flutter.
Spoiler alert! I managed to recreate it and you can check out the source code. Unfortunately, the blend modes, as well as text border, don’t work on the web, but it runs perfectly on every other platform. P.S - If you want to read about hover effects in Flutter, check this out.
If you would like to know how the blending is done, read on!
Blending colors, gradients, and ./img in Flutter isn’t anything special.
The Image widget has a colorBlendMode property that allows you to apply a BlendMode to the Image. But that’s the problem, it only allows you to use colors.
What if you wanted to blend an image with another image?
No, let’s be daring. What if we wanted to blend a widget with another widget?
I thought it was a trivial question. I couldn’t be the only one who needed this functionality. Luckily, I wasn’t.
A few questions had been raised on StackOverflow which were similar to mine. But most of the answers were workarounds that fit a particular case, making them unusable for other cases.
Finally, I resorted to asking my own question, which was never answered.
The solution
The solution to my problem came from a place I didn’t expect. RenderObjects.
RenderObjects are basically blueprints for widgets. They allow you to manipulate how a widget is drawn. Widgets like Padding, Opacity, Transform and ShaderMask are all RenderObjects.
The key is, they change the way a widget is drawn.
So when I came across the blend mask widget in the GSkinner repo, everything clicked instantly.
Here, when the BlendMask widget is rendered, it applies a blend mode to its child. Now any widget drawn under it will have the effect applied to it.
Using it is simple. Just apply the BlendMask to a widget higher in a Stack.
And bam! Any widget under it will be affected by the BlendMode you set. In this example, I use BlendMode.difference which yields the following result:
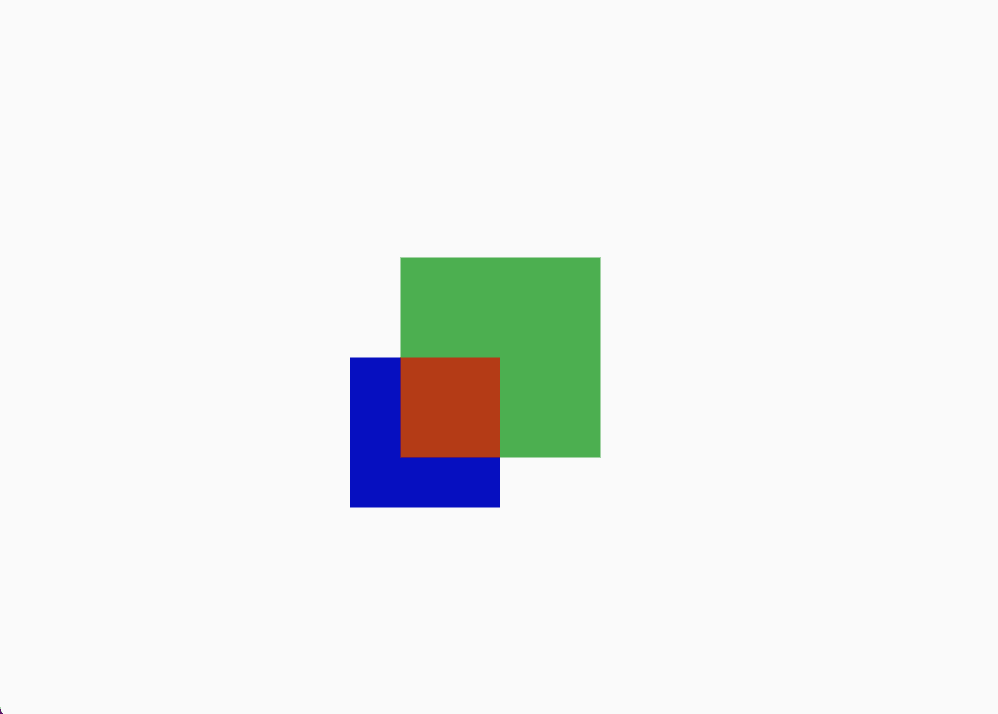
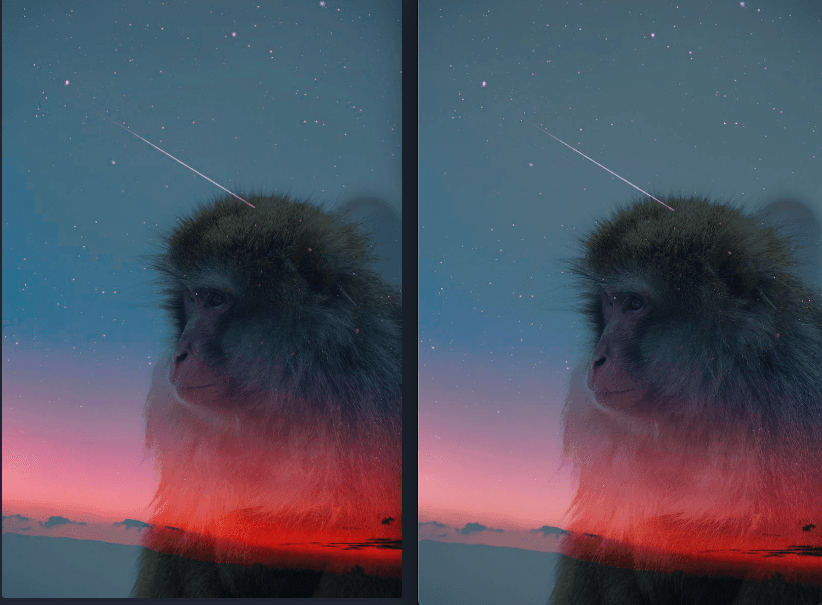
Using this method, you can blend almost every widget! The following picture shows two images blended with mix-blend-mode [multiply] in css (left) and using BlendMask with BlendMode.multipy in Flutter (right).
The effect is pretty neat, and also pretty easy to use!